Cedar is a beautiful and strong wood commonly used in outdoor furniture, decking, and siding. It is also indestructible to rot and insects, but it’s not as attractive if not finished. Here, we cover in great detail how to finish cedar for outdoor Use so your project stays looking good and strong for years to come.
Why Cedar is Ideal for Outdoor Use
Cedar is an excellent material for outdoor use due to its natural moisture resistance to watering and insect damage. Its sweet, deep color and narrow grain make it a practical and aesthetic choice for decks, fences, furniture, and siding.
But over time, outdoor cedar gets warped by the elements. Sunlight, moisture, and temperature all lead to the decoloration, buckling, or breaking of cedar. But the good news is that cedar can be maintained, even improved, with the proper finish.
Environmental Impact on Cedar
Cedar faces several outdoor elements that can damage it if untreated:
- Moisture: Long-term exposure to rain or snow can lead to swelling and decay.
- UV Rays: Sunlight cracks cedar, which turns it brittle.
- Changes in Temperature: High temperatures break or break cracks and splits.
How to Select the Correct Finish for Cedar?
The finish you choose is what keeps cedar in good condition. Here are some options:
- Oil Finishes: Use oil finishes to enhance the grain and color of cedar, preventing moisture infiltration. They must be applied annually or twice.
- Wood Stains: Available in clear, semi-transparent, and solid forms, stains coat without covering up the wood’s inherent splendor. Solid stains work best on aged cedar.
- Varnishes & Polyurethanes: Provide a protective film that will last but will detract from the natural look of the wood.
- Nano-Tech Finishes: Cutting-edge technology provides an invisible barrier for enhanced UV, water, and mildew resistance. They are environmentally friendly and need less reapplying.
01. Prepare the Cedar Surface
Cedar surfaces must be prepared before finishing. This helps the finish stick and protect the wood from the outdoors. Use a light cedar wood cleaner to clean it. Dust, filth, and previous finishes must be removed for the new finish to bind. Do not use strong chemicals that might harm the wood’s surface or remove its natural oils. After cleaning, sand the wood. Working with the grain, softly sand the surface using medium-grit sandpaper. A smooth surface and open wood pores allow the finish to enter deeper and adhere better. Before continuing, let the cedar dry completely after sanding. Wood moisture can cause finished peeling or early deterioration.
02. Choose Your Finish
The right treatment makes cedar more attractive and durable, particularly when left outdoors. tung oil and linseed oil are excellent finishes for cedar. These treatments work into the grain and add moisture resistance. Oil finishes give wood a natural, fuller look that many appreciate, especially if they don’t want to lose the authenticity of cedar. But wood treatments are wonderful for accentuating or altering cedar colors.
Semi-transparent stains balance color and wood grain while translucent stains emphasize the grain. Hard stains hide the grain and maintain color uniformity.
Nano-tech finishes are the strongest, particularly in harsh outdoor environments. The more sophisticated finishes shield the wood from sunlight, humidity, and mildew through an invisible layer. The use of nano-tech finishes eliminates the need for repeated coats on cedar exposed to extremes of weather.
03. Apply the Finish
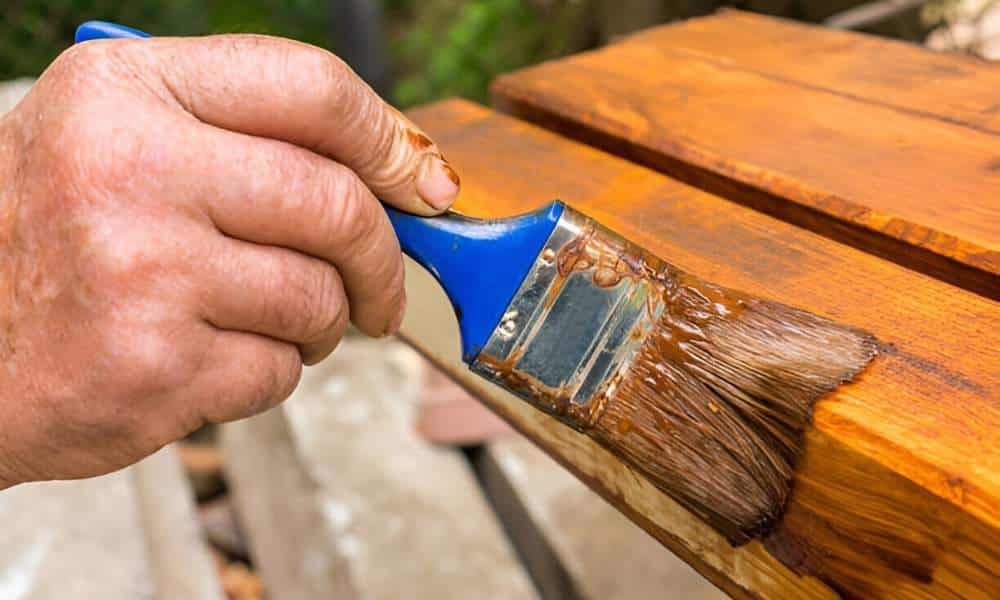
Use your cedar finish when you have selected it. How you apply depends on the finish and preference. Finish along the grain with a brush, cloth, or sprayer. You get an emollient, streak-free result. Apply the finish evenly using a brush or cloth over the whole area, including the cedar ends and edges. Ends are particularly susceptible to moisture, so wrap them well. Don’t add a second layer until the first layer is dry. It’s best to let the first coat air-dry within 24–48 hours (or per the manufacturer’s instructions to prevent adhesion issues). Sprayers may make the task of applying uniformly easier but don’t over-apply the wood.
04. Add Extra Coats
Some people will require more than one coat, depending on the finish you choose and how protective you want to be. After letting the primer dry, add another coat for greater coverage and pigmentation. Your coats will depend on the finish you are painting, but typically two or three coats should be sufficient for most oil and stain finishes.
You should apply each coat only once the previous coat is dry. Applying a second coat too early means that your previous one may not adhere evenly, creating streaks or uneven finish. Make sure to allow each coat a proper amount of time to dry properly. In some finishes like varnish or nano-tech finish, you might require several layers to create an extremely durable protective layer.
05. Regular Maintenance
Even with its protective veneer, cedar must be well maintained to maintain its condition. The finish could fade in the sun, in the rain, and in the heat. If you leave the cedar exposed, you need to refinish every 1–2 years so that it will still look good and be safe. Examine the surface for discoloration, peeling, and damage. Get it out right away if the finish fades or the wood is exposed. Refinishing cedar as soon as you notice damage prolongs its lifespan. The edges, joints, and other brittle spots wear faster than the smooth surfaces, so check them closely.
Common Mistakes to Avoid
Finishing cedar is dangerous because there is a lot that can go wrong and influence your work. Below are some common mistakes:
- Using the wrong finish: Select a finish appropriate for your climate. If you live in a hot place, make sure the product is UV-rated.
- Neglecting prep: Cleaning and sanding thoroughly are the keys to smooth surfaces. If you miss these steps, the finish will peel or crack.
- Overfishing: Applying too much finish results in uneven drying and a matted, clingy finish. Use the right amount for the effect you want.
Why UV Protection Is Essential for Cedar
The natural color of the cedar can degrade over time under UV rays. This is particularly true for outdoor cedar, which is exposed to the elements year-round. Using a UV-resistant finish is vital for keeping the wood bright and free of fading from the sun.
Some finishes have a UV Blocker that keeps the sunlight from tearing down the wood’s organic fibers. Such products can maintain the beauty of your cedar while extending its lifespan.
How To Finish Cedar Wood
On the environmentally friendly side, green finishes are out there that are chemical and solvent-free. These eco-friendly alternatives are neither toxic to the environment nor harmful to you. Here are some options:
- Natural oils like tung oil And linseed oil Are biodegradable And non-toxic.
- Water-based stains contain fewer volatile organic compounds (VOCs), ><Making them more eco-friendly.
Selecting sustainable finishes can help to give your cedar decking project a natural look and appeal.
Troubleshooting Common Cedar Finish Problems
Even with the finest finishes, you could experience some basic hiccups. Here’s how to troubleshoot:
1. Peeling or Flaking Finish
- Damaged from insufficient preparation or moistness. To correct it, sand the area and refinish it properly.
2. Fading or Discoloration
- This occurs when finishes degrade over time with UV exposure. Use a new UV protection finish to fix the color.
3. Mold and Mildew
- While cedar is impervious to mold, it will still occur if moisture gets trapped in the wood. Cleaning and refinishing the finish will ensure this doesn’t happen.
Conclusion
Cedar is a good choice for the outdoors, and you should finish it well to keep it looking beautiful and free from deterioration. Whether you choose oils, wood stains, varnishes, or new nano-tech finishes, picking the proper finish is important for ensuring that the wood survives. As long as you maintain and refinish it as you desire, your cedar furniture, decking, or siding will remain in top condition for many years to come. With these easy steps, you can enjoy the beauty and longevity of cedar, and save it from rot.
FAQs
How often should I finish cedar wood?
Based on the kind of finish used and the degree of weather exposure, it is advised to renew the finish every 1-2 years.
Can I use regular paint on cedar?
Paint can trap moisture, making it the worst choice for cedar. Wood stains or oil finishes are preferable for maintaining cedar’s natural beauty and moisture resistance.
What’s the best finish for cedar exposed to extreme weather?
Nano-tech finishes provide superior protection from UV rays, moisture, and mildew, making them an excellent choice for harsh weather conditions.
How do I know if my cedar needs to be refinished?
Check for discoloration, peeling, or fading. It’s time to clean and reapply the finish once its weariness starts.
Are there eco-friendly options for finishing cedar?
Yes, natural oils like tung oil, linseed oil, and water-based stains are biodegradable and contain fewer volatile organic compounds (VOCs), making them more eco-friendly options.


