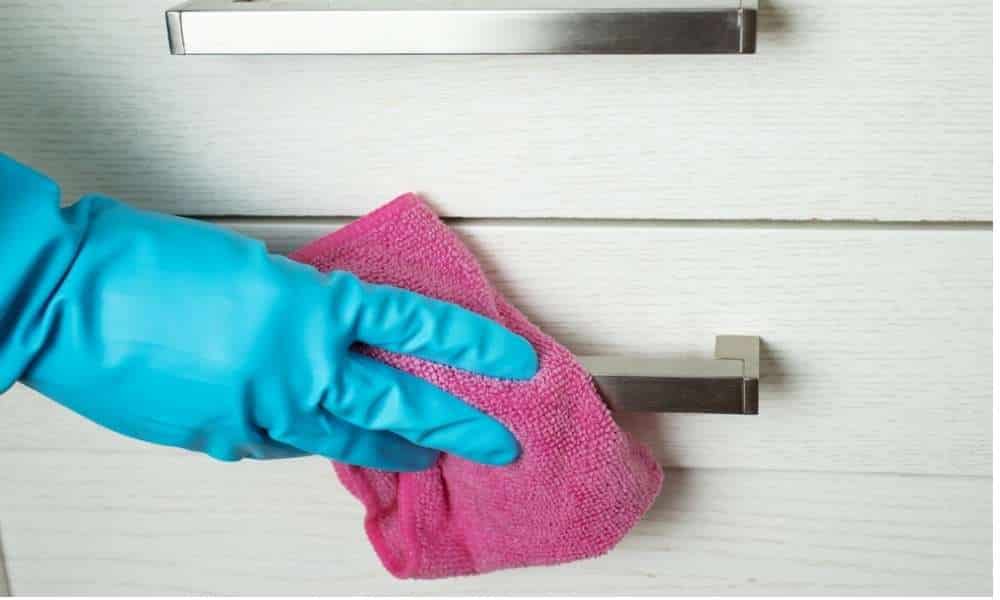
Fixing a leaky outdoor spigot can be an aggravating and inconvenient experience, not only wasting water and increasing utility bills but also leading to potential damage if left unattended. Luckily, fixing one is an easily manageable task that doesn’t necessarily require advanced plumbing skills; in this guide, we’ll outline several simple steps for diagnosing issues, how To fix A leaky Outdoor spigot, gathering necessary tools, and successfully fixing that pesky leak – with patience and some basic knowledge, your outdoor spigot should soon be back up and running as intended!
What Causes A Leaky Outdoor Faucet Or Spigot?
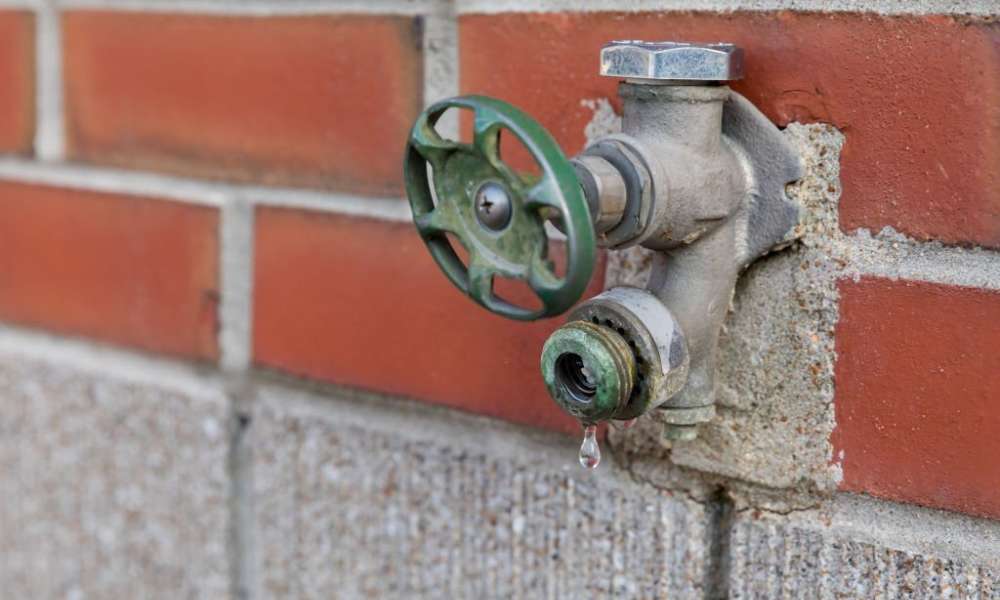
Various environmental elements can expose outdoor faucets or spigots to extreme temperature variations and wear-and-tear, as well as daily wear-and-tear. All of this wear can lead to leakage; one primary cause is the degradation of their internal washer. Over time, the washer can become worn out or damaged and cause leakage from a spigot.
Furthermore, O-ring seals in the spigot may deteriorate further leading to leakage issues. Not to mention, in winter if water remains in your faucet and freezes, it can expand, exerting pressure on pipes, and potentially leading to cracks. A faulty valve seat or buildup of minerals and sediment can also contribute to this issue – being aware of these causes is the key step toward diagnosing and fixing an outdoor faucet leak effectively
1. Identifying The Cause
Prior to initiating repairs, it’s essential to identify the source of leakage. Start by noting where it comes from: is it coming from the spout or handle? A dripping spout leak often indicates worn-out washers; while handle leaks could point towards damaged packing nuts or stems. Seasonal variations could provide further clues; for example, if problems surface after an unusually cold winter it might indicate potential freezing damage as a cause.
By carefully studying these signs and understanding their faucet design homeowners can effectively diagnose issues more efficiently for targeted repairs that ensure more cost-effective repairs than ever before!
2. Gather The Necessary Tools And Materials
Before embarking On your repair journey, It’s imperative To have the right tools And materials On hand.
- Adjustable Wrench
- Phillips And Flat-head Screwdrivers
- Replacement Washer
- Teflon Tape
- Plumber’s Grease
- O-ring Or Packing Nut
- Bucket Or Pan
- Old Towel Or Rag
- Pipe Cutter Or Hacksaw
- Replacement Stem
Always remember To turn off the water supply before starting any repairs.
3. Turn Off Your Water Supply
Before beginning repairs on a leaky outdoor spigot, it’s crucial that you first switch off its water supply. Locate the valve controlling flow to your spigot – typically found inside your house or basement. Utility area – and turn it clockwise until fully closed, effectively stopping water flow to the affected area and creating an optimal environment for repair work without risk of water leakage or unexpected surprises. By taking this essential yet straightforward step you create an atmosphere conducive to focused yet hassle-free repair that ensures success!
4. Accessing The Washer Assembly
Step two in fixing your outdoor spigot’s leak is accessing its washer assembly. Begin by carefully unbolting its handle using an adjustable wrench or pliers. Dependent upon the type of spigot you own, accessing its inner components may require unscrewing a retaining nut or taking down decorative caps. Once this step is completed, usually there is a packing nut or bonnet holding everything together. Loosen and remove this nut with appropriate tools, revealing the stem and washer. Carefully inspect this washer for signs of wear, cracks, or damage – replacing it may be the answer to stopping leaks! Taking your time during this step ensures a comprehensive analysis and leads to successful repairs.
5. Check The Packing Nut
Examining the packing nut is essential when diagnosing leaky outdoor spigots. Once you gain access to its internal components. Inspect its packing nut (usually located near the handle) closely for signs of wear, corrosion, or damage that might be contributing to leaks. Tighten it slightly if there are cracks or visible deterioration that could potentially alleviate leaks – however, be wary not to overtighten as overdoing may lead to additional issues; otherwise, tighten it until tightened enough that this doesn’t solve its source – otherwise, further examination and repair may be required.
6. Remove The Vacuum Breaker Cap
To effectively repair an outdoor spigot that leaks, it’s crucial that the vacuum breaker cap be checked if equipped. This cap often sits at the end of the spigot and serves to prevent backflow or contamination of water supplies. Start by turning off the water supply to the spigot and relieving any pressure by opening its stem. Next, using a wrench or pliers carefully remove the vacuum breaker cap. Note that some may be threaded while others might be secured by screws. Once the cap has been taken off, carefully examine it for any signs of debris, sediment, or damage which could be contributing to leaks. Clean or replace as necessary until leaks cease and ensure the proper functioning of the outdoor spigot
7. Focus On The Parts
Start by disassembling the spigot to access its internal parts. Especially its washer which often causes leaks due to wear and tear. Checking and tightening any corrosion on packing nuts; inspecting packing nuts for corrosion damage as needed. And, for spigots with vacuum breaker caps, check for debris accumulation. Step-by-step repairs ensure an effective repair while regular maintenance such as replacing worn parts will increase its longevity and prevent future leaks – and by taking this approach you won’t just repair leaks but improve performance and overall!
8. Replace The Washer Or O-ring
Replacing washers or O-rings to fix an outdoor spigot that leaks is usually an efficient yet straightforward solution. As wear and tear over time can lead to leaky fixtures. Once disassembling is completed and its internal mechanisms accessed, carefully extracting worn washers or O-rings becomes the focus. Noting their specifications helps select replacements from a hardware store. Installing the newly fitted ones should end leaks immediately while improving efficiency while decreasing water wastage – thus underscoring the importance of ongoing maintenance in maintaining leak-free outdoor water sources. This simple yet targeted approach highlights its significance And underscores maintenance’s significance in maintaining leak-free outdoor water sources.
9. Apply Plumbing Tape
Applying plumbing tape, commonly referred to as Teflon tape, can be an invaluable asset. Used as an effective sealant for threaded connections and to help minimize leaks around joints. Wrapping a thin layer clockwise around a threaded end of the spigot helps create a secure seal when reattaching hoses or components. This simple yet practical technique ensures watertight connections. An investment of time spent applying this tape could reap significant returns in terms of leak prevention and overall plumbing integrity! Remember, even just investing a little time can yield significant dividends when applied correctly!
10. Reassemble The Spigot
Once you have installed new components and made any necessary adjustments, the final step in fixing a leaky outdoor spigot is reassembly. Carefully insert the stem back into its body ensuring. It fits securely if using plumbing tape as a binding mechanism – this step helps ensure an airtight and watertight connection is established.
Gently tighten the packing nut with pliers or a wrench, being mindful not to over-tighten and cause damage to components. After tightening, secure and reattach the handle as securely as possible before turning back on the water supply and opening the spigot for testing any possible leaks.
Reassembling the spigot methodically will complete your efforts to restore its functionality and stop those persistent leaks for good.
11. Test For Leaks
Once the repairs have been completed and your outdoor spigot reassembled, the next crucial step should be testing for leaks. Switch on your water source gradually while opening fully the spigot. Keep an eye out for any signs of water seepage around connections or within nearby areas. Listening closely for any drips or hisses that might indicate persistent leakage.
Take your time when conducting this step, carefully inspecting each angle of the spigot to ensure a thorough check and no leaks are identified. If so, then your efforts have paid off and the repair was successful.
When inspecting outdoor spigots for leaks, take note of their exact locations before considering further adjustments or replacements as necessary. A meticulous testing phase can give you confidence that your outdoor spigot is back up and running optimally – without leaks!
12. Outdoor Faucet Leaks When Turned On
Discovering that your outdoor faucet leaks when turned on can be an aggravating ordeal. Not only wastefully wasting water but also raising concerns over potential damage to your yard or garden. A systematic approach should be used when dealing with this issue. Start by looking closely at components such as washers and O-rings which often deteriorate over time and cause leakage, then inspect connections for signs of wear or loose fittings before considering further steps.
Tightening the packing nut or applying plumbing tape may help address leaks. Once you’ve made any necessary adjustments or replacements, reassemble your faucet carefully. Test it again gradually while keeping an eye out for persistent leaks to determine the source of any persistent issues – this methodical approach should help identify your outdoor faucet’s problem quickly so you can enjoy your outdoor space again without interruption from leaky faucets!
13. Tips for Long-Term Maintenance of Your Outdoor Spigot
Regular visual inspections can detect minor leaks or signs of wear early, so be on the lookout for any dripping or wet spots near the spigot and connections. Furthermore, as seasons change be mindful of freezing temperatures that could result in cracked pipes.
Disconnect and drain hoses before winter sets in to avoid water from freezing and causing damage, while installing a faucet cover provides added protection from the cold. Furthermore, consider installing a hose bibb vacuum breaker to protect against backflow. Contamination of your water supply – these simple yet effective tips ensure that your outdoor spigot remains leak-free and functional for as long as possible!
Conclusion
Mastering the art of fixing an outdoor spigot allows homeowners to take control of their water usage while protecting the integrity of outdoor spaces. By carefully identifying leak sources. Assessing components like washers and packing nuts for wear-and-tear issues, inspecting key washers, And inspecting packing nuts for wear-and-tear. By applying plumbing tape or employing other strategies (such as using plumbing valves instead), the process becomes less daunting. Keep in mind that successful repairs depend on patience, attention to detail, and taking a methodical approach – arming yourself with this knowledge will enable. You to address leaks while protecting the longevity and functionality of your outdoor spigot.