Welcome To our comprehensive guide On “How To Install Blink Outdoor Camera.” Elevating your home’s security Has never been easier. From unpacking The box To finalizing settings On your app, We’ve got it all covered. This guide aims To help Both tech enthusiasts And those new To home security. We break down the entire process Into manageable steps. Ensuring that you can set up your Blink Outdoor Camera with little To no stress. Equip yourself with the knowledge To fortify your home’s outdoor spaces By following our in-depth installation walkthrough.
What Is A Blink Outdoor Camera?
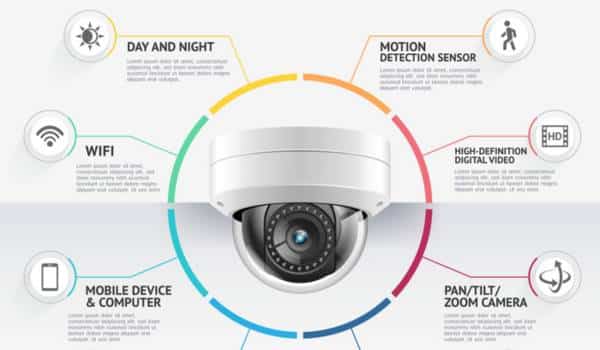
It is A wireless, Battery-operated security device designed To monitor exterior areas Of your home Or business. It boasts weather-resistant construction And HD video capabilities. Provides reliable protection And seamless connecting With various smart devices via Wi-Fi connectivity enabling real-time alerts And live Viewing via smartphones. An attractive choice Among homeowners seeking efficient ways To enhance security. Plus with its affordability And modern features, It represents An important leap forward For modern home protection.
Why Choose Blink Outdoor Camera
Selecting the Blink Outdoor Camera as part of your security needs provides numerous distinct advantages. Its wireless design offers A hassle-free setup And allows For flexible positioning For optimal coverage. With its advanced motion detection feature. The Camera sends instant alerts directly to your phone when any suspicious activity is detected. Providing instant awareness. Plus its weatherproof construction makes it suitable for different outdoor conditions for smooth operation. Integrating seamlessly into popular smart home systems adds ease and control for monitoring property at any time, anywhere. With its competitive price point And energy-saving performance. The Camera is A practical, Modern security solution at An attractive price point.
Tools Needed To Install Blink Outdoor Camera.

Installing a Blink Outdoor Camera requires having the appropriate tools at your disposal in order to be smooth and efficient. In general, you will require a drill with appropriate drill bits in order to mount its bracket securely onto hard surfaces like brick or concrete. Phillips screwdrivers Are useful tools For tightening screws. While levels help ensure the camera is aligned appropriately. A ladder may also be necessary if installed at height. Tape measures and pencils can come in very handy when measuring the distance between components such as cameras. In case any additional tools are necessary for marking drill holes. Always refer to your kit manufacturer’s instructions for any necessary modifications or additions.
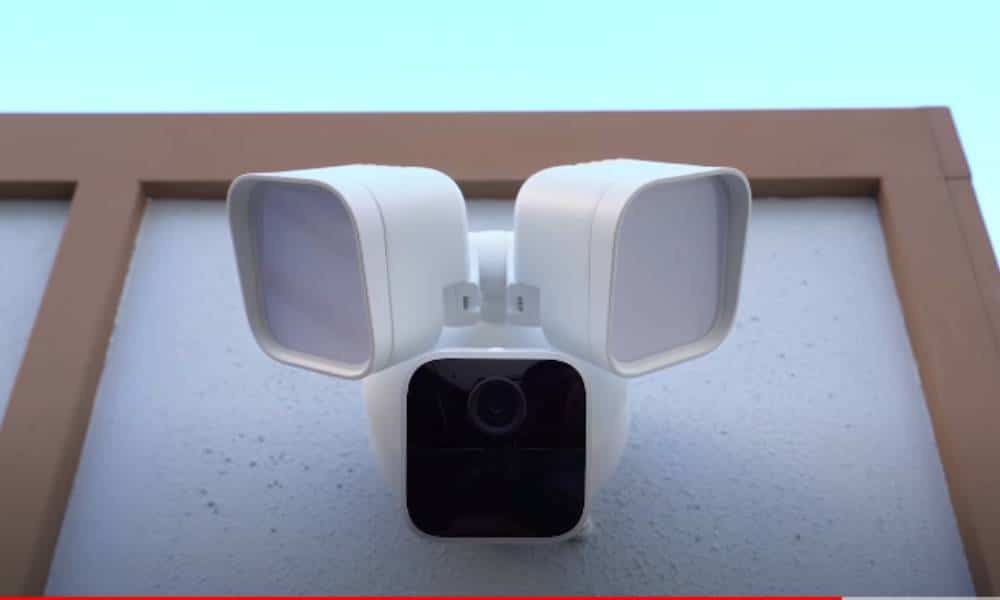
01. Find The Perfect Spot
Locating your Blink Outdoor Camera in An optimal spot Is essential To its efficiency. When selecting an area, prioritize those that cover primary entryways like doors. And windows while taking into account outdoor areas like driveways or pathways. Cameras should Be placed at An angle that provides A wide field of view without obstructions. Usually 8-10 feet off the ground, to reduce tampering but still capture clear visuals. Be mindful Of factors like sunlight And battery access when selecting an ideal spot. Evaluate Wi-Fi signal strength to ensure uninterrupted connectivity – By considering all these aspects carefully. You can find an ideal location for your Camera that provides both security and peace of mind.
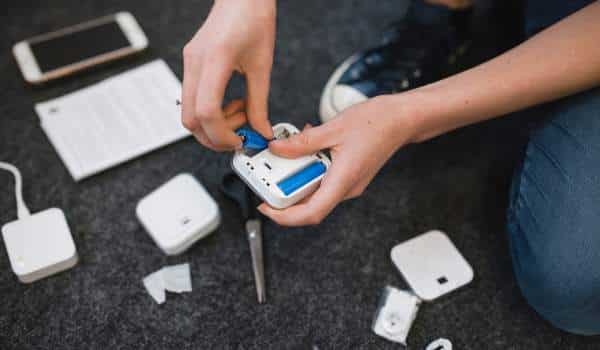
02. Unbox The Camera

Unboxing your new Blink Outdoor Camera Is An exciting first step toward strengthening the security Of your home. In its protective packaging, The camera should arrive safely. Alongside your camera will likely be mounting brackets, screws. And any necessary hardware for installation. There may also be An instruction manual Or quick start guide with detailed steps For setting up And using your camera.
Before opening your Camera box. It’s advisable to review its contents against the list provided And become familiar with each component. When handling and installing it. Take care in keeping everything tidy as you go along – opening its packaging marks the start of a safer home environment.
03. Mount The Camera

Installing the Camera is A crucial step in setting up A security system. Start by placing its mounting bracket at its desired location using a level to make sure that it remains horizontal. Use a pencil to mark the screw holes. Then use a drill with an appropriate bit to make pilot holes on hard surfaces if mounting to them. Install any wall anchors if included and align your bracket over them using either A Phillips screwdriver or drill to tighten securely the screws.
Once the bracket is secure. Attach the cameras ensuring it’s clipped or screwed securely depending on their model. Adjust its angle so it covers your desired field of view. Tighten any adjustment knobs or screws as necessary. You have successfully mounted your Cameras and are now ready for vigilant monitoring of your property.
04. Connecting To Wi-fi To Install Blink Outdoor Camera.
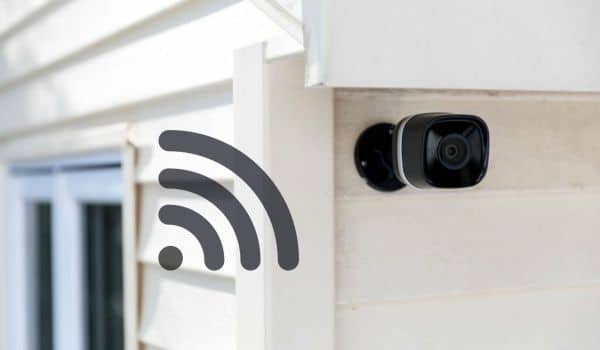
Connecting your Camera To Wi-Fi is essential To unlocking Its smart features. Download the official Blink app onto your phone and create or log into your account. Then choose to Add Cameras / Select Model when prompted. Your camera should then prompt you to enter your Wi-Fi network credentials. Make sure it supports 2.4GHz as your router does. Once your credentials are entered, the app may present you with a QR code or other prompts to help connect your Cameras To Wi-Fi. Allowing it to provide live feeds and alerts directly to your mobile device. Simply follow these on-screen instructions, And your Cameras should be connected in mere moments.
05. Insert Batteries To Install Blink Outdoor Camera.
Inserting batteries in your Camera Is an easy And essential process, Necessary to power It. First, Locate the battery compartment, which should be located either at the back or bottom. Depending on your cameras model. You may have to slide or unscrew a cover in order to access this location. Referring to the user manual will allow you to identify the appropriate battery type (typically AA lithium batteries). And ensure they are correctly oriented with regard to positive and negative terminals.
Once completed, carefully insert them as indicated and secure their back into place using the cover provided. Some models will provide visual or audible confirmation that their batteries are working. Or you can check using the Blink app to see its status. Once powered up and equipped with batteries installed. Your Cameras are now ready to monitor and protect your premises.
06. Blink Camera Installation Manual

The Camera provides An effective And user-friendly solution For outdoor security needs. Boasting wireless design, HD video capabilities, Motion detection, And weather-resistant features. As well as its weatherproof build – The cameras deliver reliable monitoring for both homes and businesses alike.
Easy to set up via Wi-Fi connectivity, Real-time alerts can be sent through an exclusive app allowing remote viewing or real-time alerts. Everything from unboxing through mounting is designed around user convenience. Whether looking to increase home security or keep an eye out while away – the Cameras offer a modern comprehensive option.
07. Sync The Camera With The Blink App
Synching up your Camera with the Blink app is essential for full control. And monitoring directly from your mobile device. Start by downloading it from the app store, and creating or logging into an account, Activating your cameras. Within the app, find the option for adding new cameras and follow its prompts – typically by scanning a QR code or entering the serial number found on the cameras themselves.
Once detected, The app will walk you through connecting To your Wi-Fi network And configuring Its settings. When complete, you’ll have real-time access To live feeds, Alerts, And various cameras controls At your fingertips. Making the sync process quick and seamless – perfect for incorporating Cameras into your daily routine for added protection and peace of mind.
08. Adjust The Camera Settings To Install Blink Outdoor Camera
Adjusting the settings On your Camera is Key To personalizing it To fit your specific needs And preferences. Once synced with the Blink app, You have access To an array of customizable options. Adjust the camera’s sensitivity to motion. Set notification preferences, Create activity zones, And configure recording length settings.
User-friendly controls make adjusting Cameras settings simple and intuitive. Use sliders, Toggles, Or drop-down menus To easily make adjustments. There may also be options available to you to adjust video quality, infrared night vision settings, and Audio settings. Regularly reviewing these settings will ensure it fits with your daily life. Providing personalized security that prioritizes what matters to you most.
09. Test The Camera
Testing your camera is an essential final step to make sure it works as intended. Use the Blink app to access a live view and observe real-time footage from it. Check image quality, and field of view and ensure the camera is capturing your desired area without obstructions or glare.
Also, test motion detection by walking within its range before verifying notifications are delivered promptly to your mobile device. If the cameras feature audio features, carefully evaluate their sound quality to make sure it is clear and free from interference. Any necessary adjustments to cameras position or settings can also be made at this point if necessary. Conducting thorough tests ensures your Cameras will provide reliable surveillance For your property.
Blink Outdoor Camera Mount Without Screws
Mounting a Camera without screws may be an attractive solution for those who wish to avoid drilling into walls and surfaces. Such as renters or those seeking a discreet placement for the camera. It could even prove useful When renting Or placing in sensitive spots such As rooftops. Adhesive mounts Are An increasingly popular way To securely support cameras’ weight without using screws. Often featuring pre-applied, Strong adhesive backing that adheres To different surfaces.
To install the cameras, first make sure to thoroughly clean and prep the surface. Remove its backing, And press firmly against the mount. Certain camera models might offer non-screw mounting brackets or magnetic bases designed specifically for their product. Consult manufacturer guidelines as well as your specific mounting location to choose the most effective no-screw method for mounting Cameras.
How To Setup Blink Indoor Camera
The Blink Indoor Cameras were designed To offer convenient And discreet monitoring In the home. With features including HD video quality, Motion detection, And easy integration With mobile devices through the Blink app. You’ll have peace Of mind knowing these cameras provide security And peace.
Easily mountable On walls Or shelves alike For monitoring any room. It’s wireless design And easy setup process makes it accessible regardless of technical expertise. Customizing settings, Connecting Wi-Fi networks, And receiving alerts make this versatile device ideal For keeping An eye On what matters most Within your home.
Conclusion
Installing Blink Outdoor Cameras is A user-friendly process designed To increase security And peace Of mind On your property. From finding An ideal spot And mounting it To connecting To Wi-Fi and configuring settings through the Blink app. Each step has been carefully considered To make installation effortless for users without technical expertise. In no time at all you can have your surveillance setup. With options to customize sensitivity alerts video quality and more for tailored surveillance tailored to individual needs. Embrace the confidence of having modern security watching over your premises!
Faq
How Do Blink Cameras Work?
It uses motion sensors to detect movement. Activating HD video recording or live-streaming. Once connected wirelessly to your home Wi-Fi network, these cameras offer remote control and monitoring through the Blink app. With customizable settings, and battery operation options. Integration With smart devices provides flexible yet user-friendly home security solutions.
Does Blink Connect Directly To Wi-Fi?
Yes, Blink Cameras connect directly To your Wi-Fi network For remote monitoring And control through the Blink app. Providing simple installation and flexible placement options. Once connected To Wi-Fi, You can gain access To live video feeds. Receive motion alerts, And adjust settings from anywhere using any compatible mobile device.
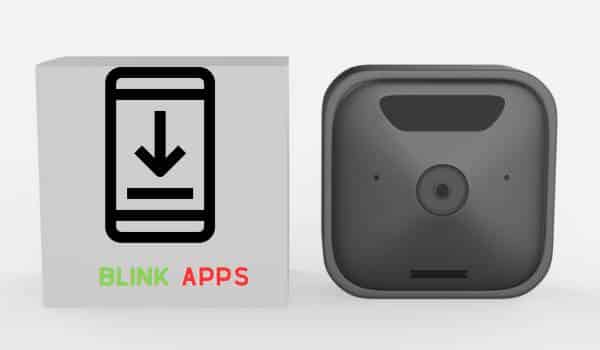
How Do I Install Blink App?
To install the Blink app, Go To the App Store Or Google Play Store on your mobile device. Search for “Blink Home Monitor,” and tap ‘Install.’ Once downloaded, Open the app. Create or log into your account, And follow the prompts To sync with your Blink Cameras.